Mobile Bookshelf: Add/Update Book - Usage
Overview
You can add, update, and delete book information in the app.
Book details can be entered manually, or you can scan a barcode to fetch some information from the internet.
Add Book
Step 1
Tap the Add tab in the app.
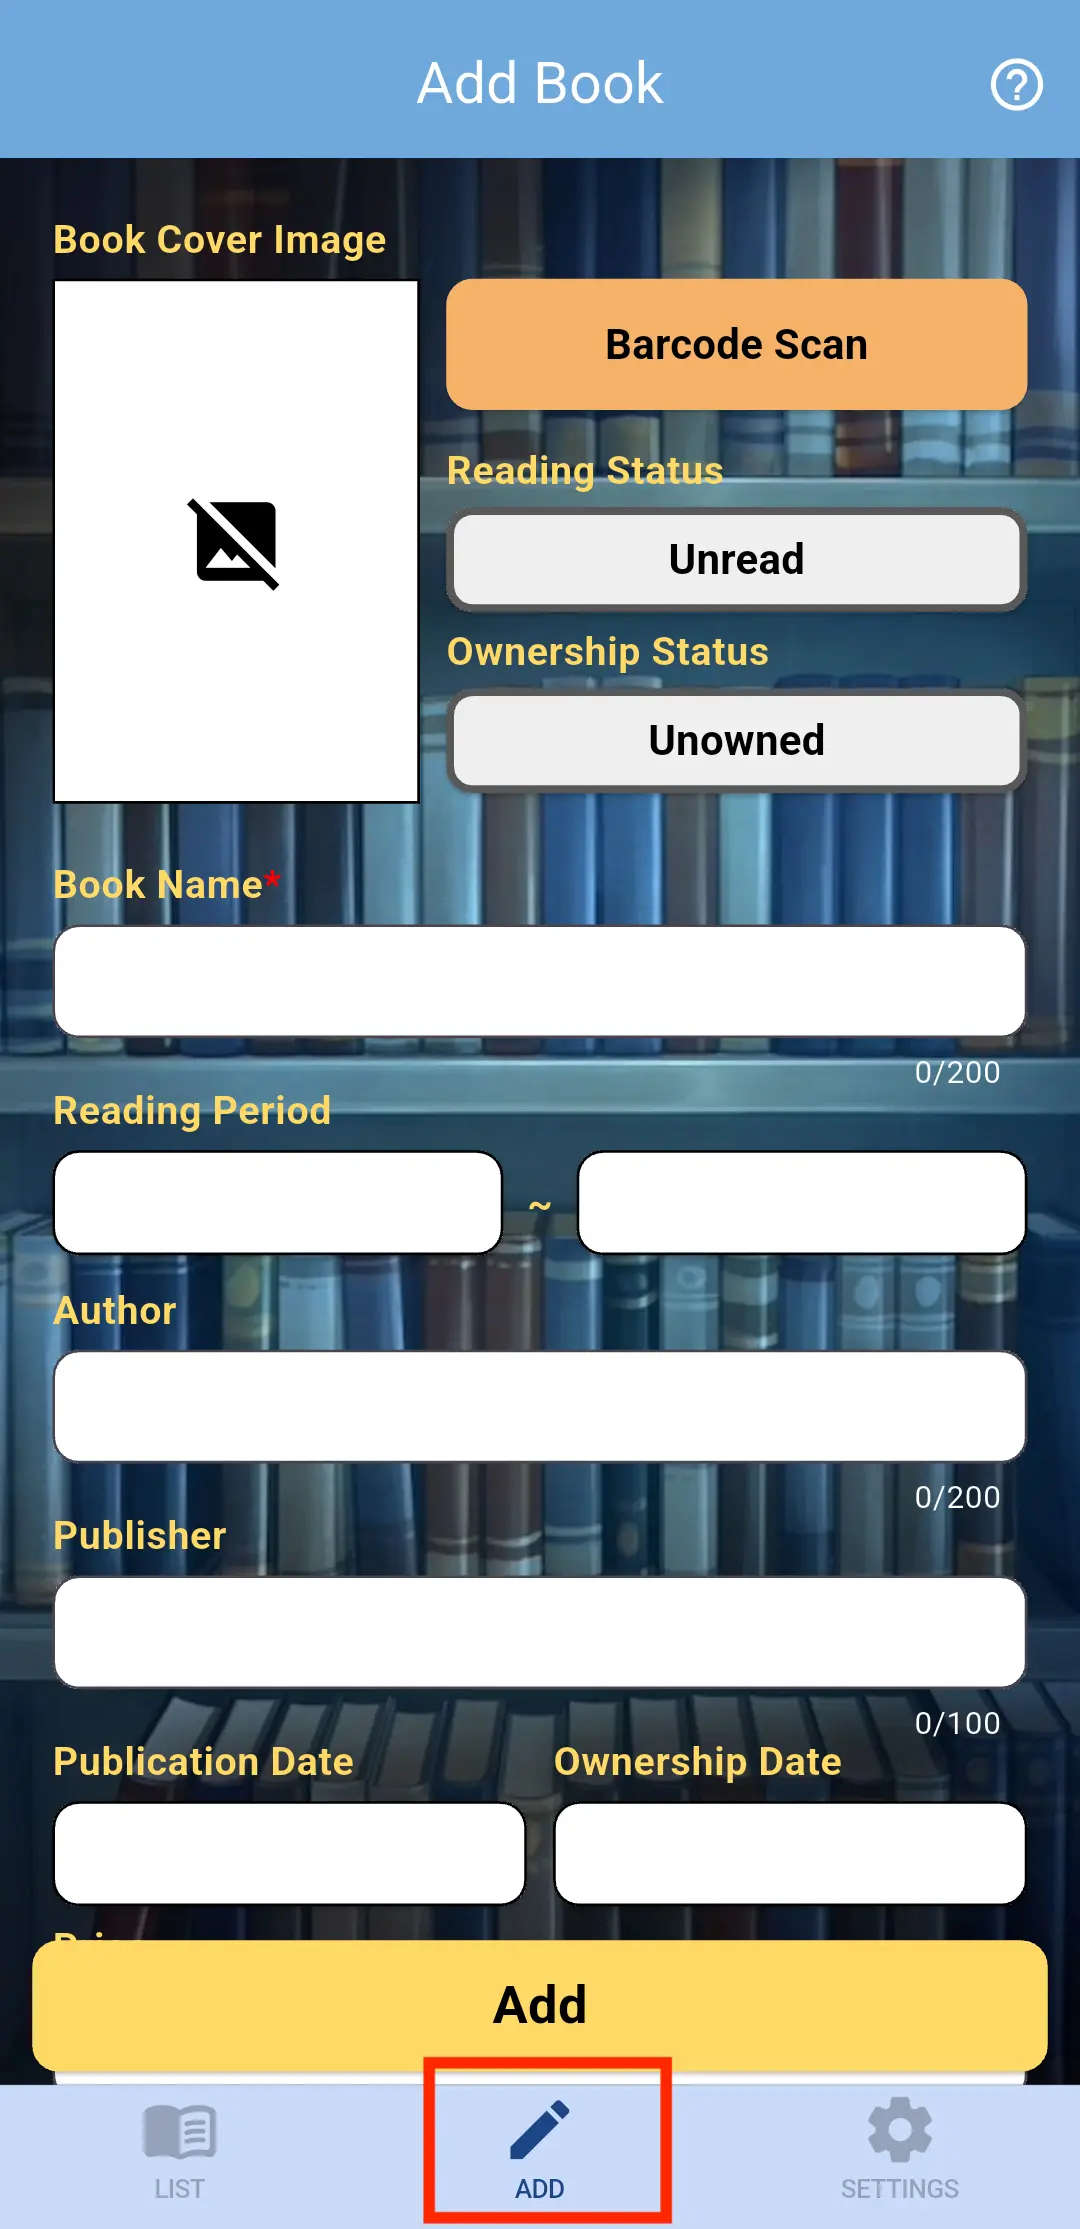
Step 2
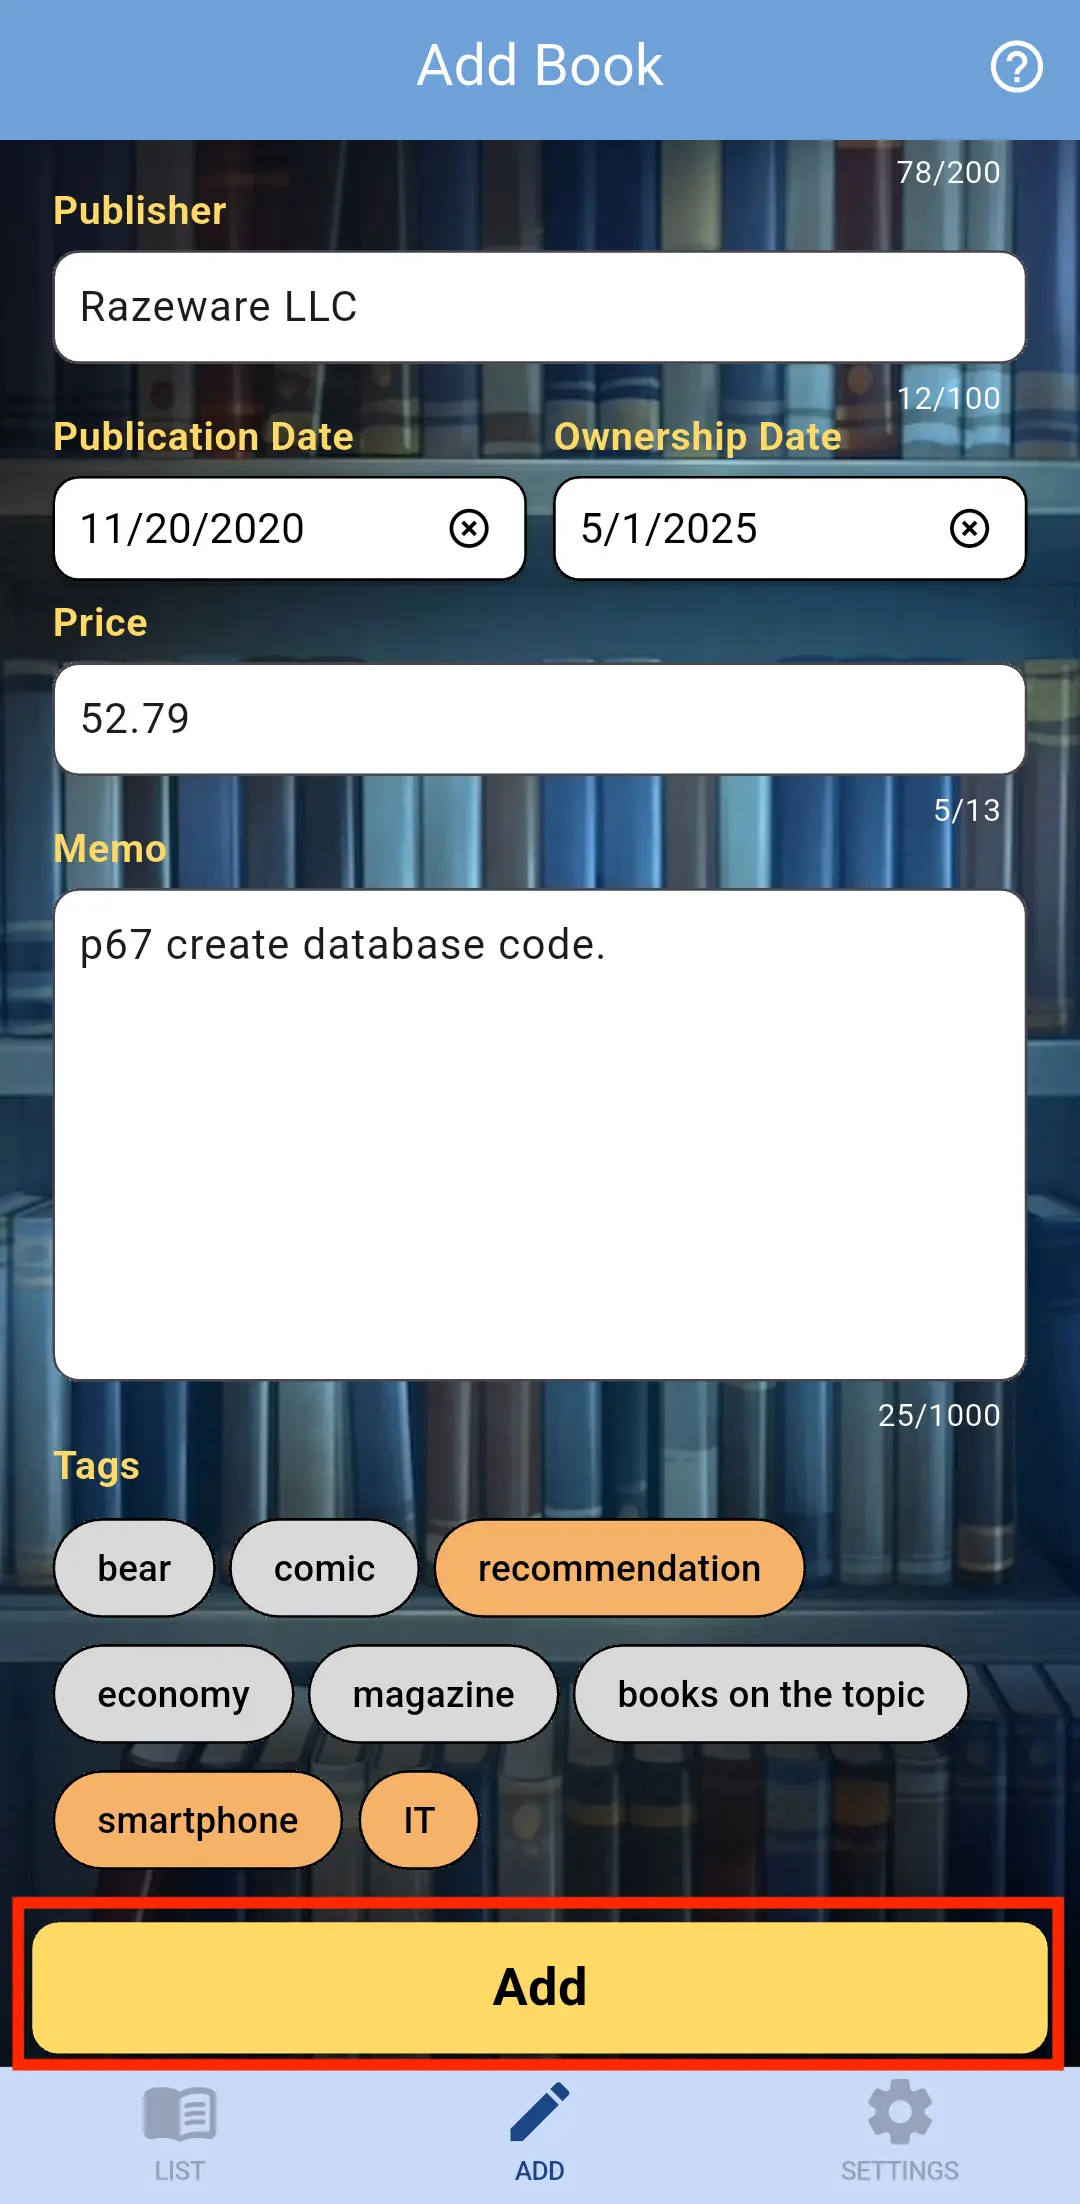
Please fill in the following fields.
(Only “Book Name” is required. All other fields are optional and can be filled in as needed.)
- Book Cover Image
-
You can add a cover image for the book.
For details on how to add an image, please see the information below. - Barcode Scan
-
The barcode scan screen will launch.
By scanning the barcode on a book, you can retrieve its information from the internet.
Note: Information may not be available online for some books.
If the information is successfully retrieved, the following fields will be automatically filled:
- Book cover image
- Book Name
- Author
- Publisher
- Publication date
Note: Not all of the above fields are guaranteed to be retrieved. (Examples: only the title and author may be available.)
For detailed instructions on how to scan barcodes, please refer to the section below. - Reading Status
- Please select the reading status of the book.
- Tapping the button will cycle through the available reading statuses.
- There are three statuses in total:
- Unread: You haven't read the book yet.
- Reading: You are currently reading the book.
- Completed: You have completed reading the book.
- Ownership Status
- Please select the ownership status of the book.
- Tapping the button will cycle through the available ownership statuses.
- There are four statuses in total:
- Unowned: You do not own the book.
- Owned: You own the book.
- Lent Out: You have lent the book to someone or to a facility.
- Borrowed: You have borrowed the book from someone or a facility.
- Book Title
- Please enter the title of the book.
- This field is required.
- Reading Period
- Please enter the period during which you read the book.
- Author
- Please enter the author's name.
- Publisher
- Please enter the publisher's name.
- Publication Date
- Please enter the publication date of the book.
- Ownership Date
- Please enter the ownership date of the book.
- Price
- Please enter the price you paid to acquire the book.
- Notes
- Please enter any notes.
- Examples: your impressions of the book, pages you found important, the name of the store where you bought it, etc.
- Tags
- Please select the tags you want to associate with this book (multiple selections allowed).
-
You need to create your own tags in advance.
Please refer to [this guide] to create tags.
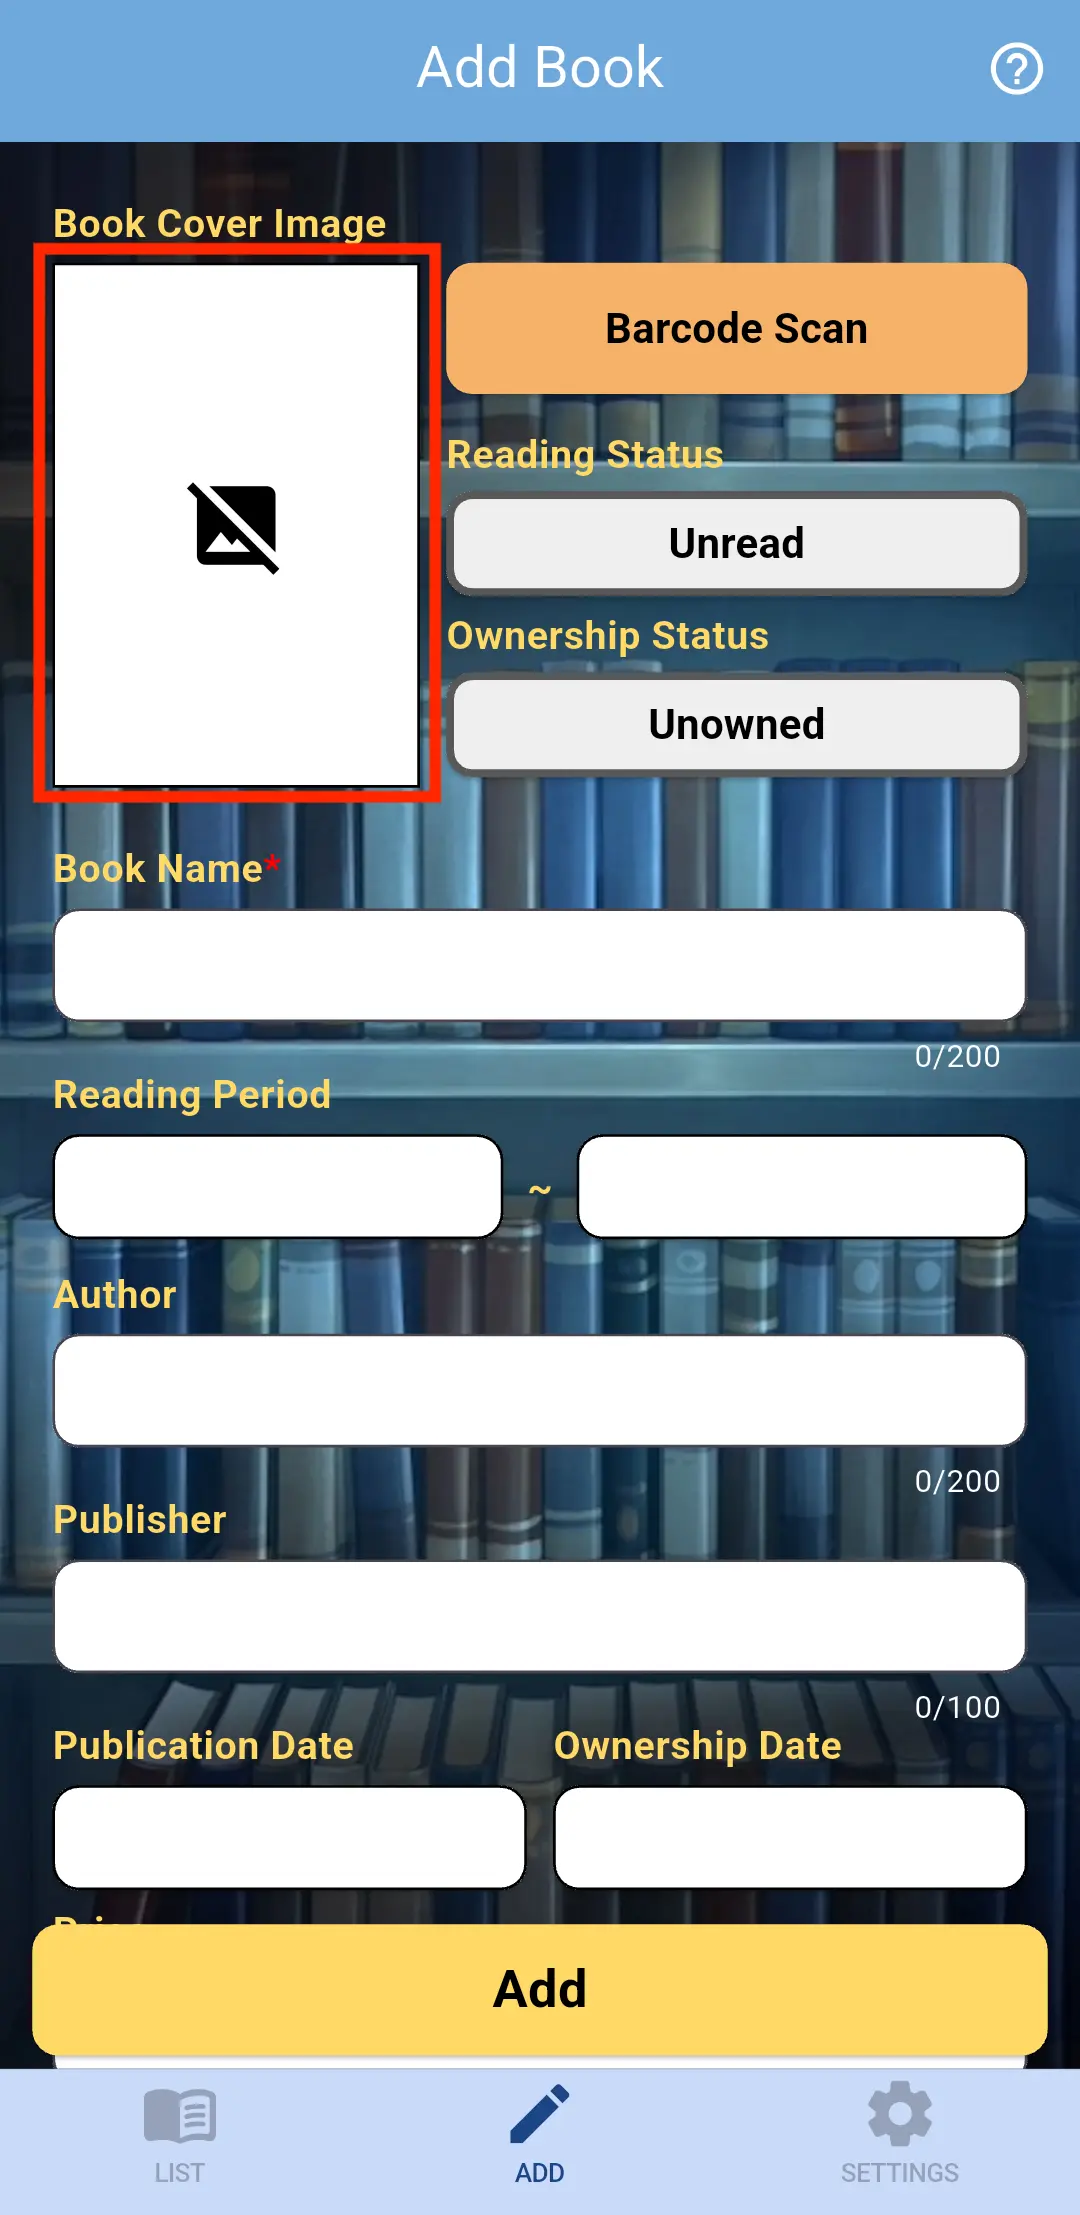
Add a Book Cover Image
Step 1
Tap the book cover image.
Step 2
Choose how you’d like to add the image.
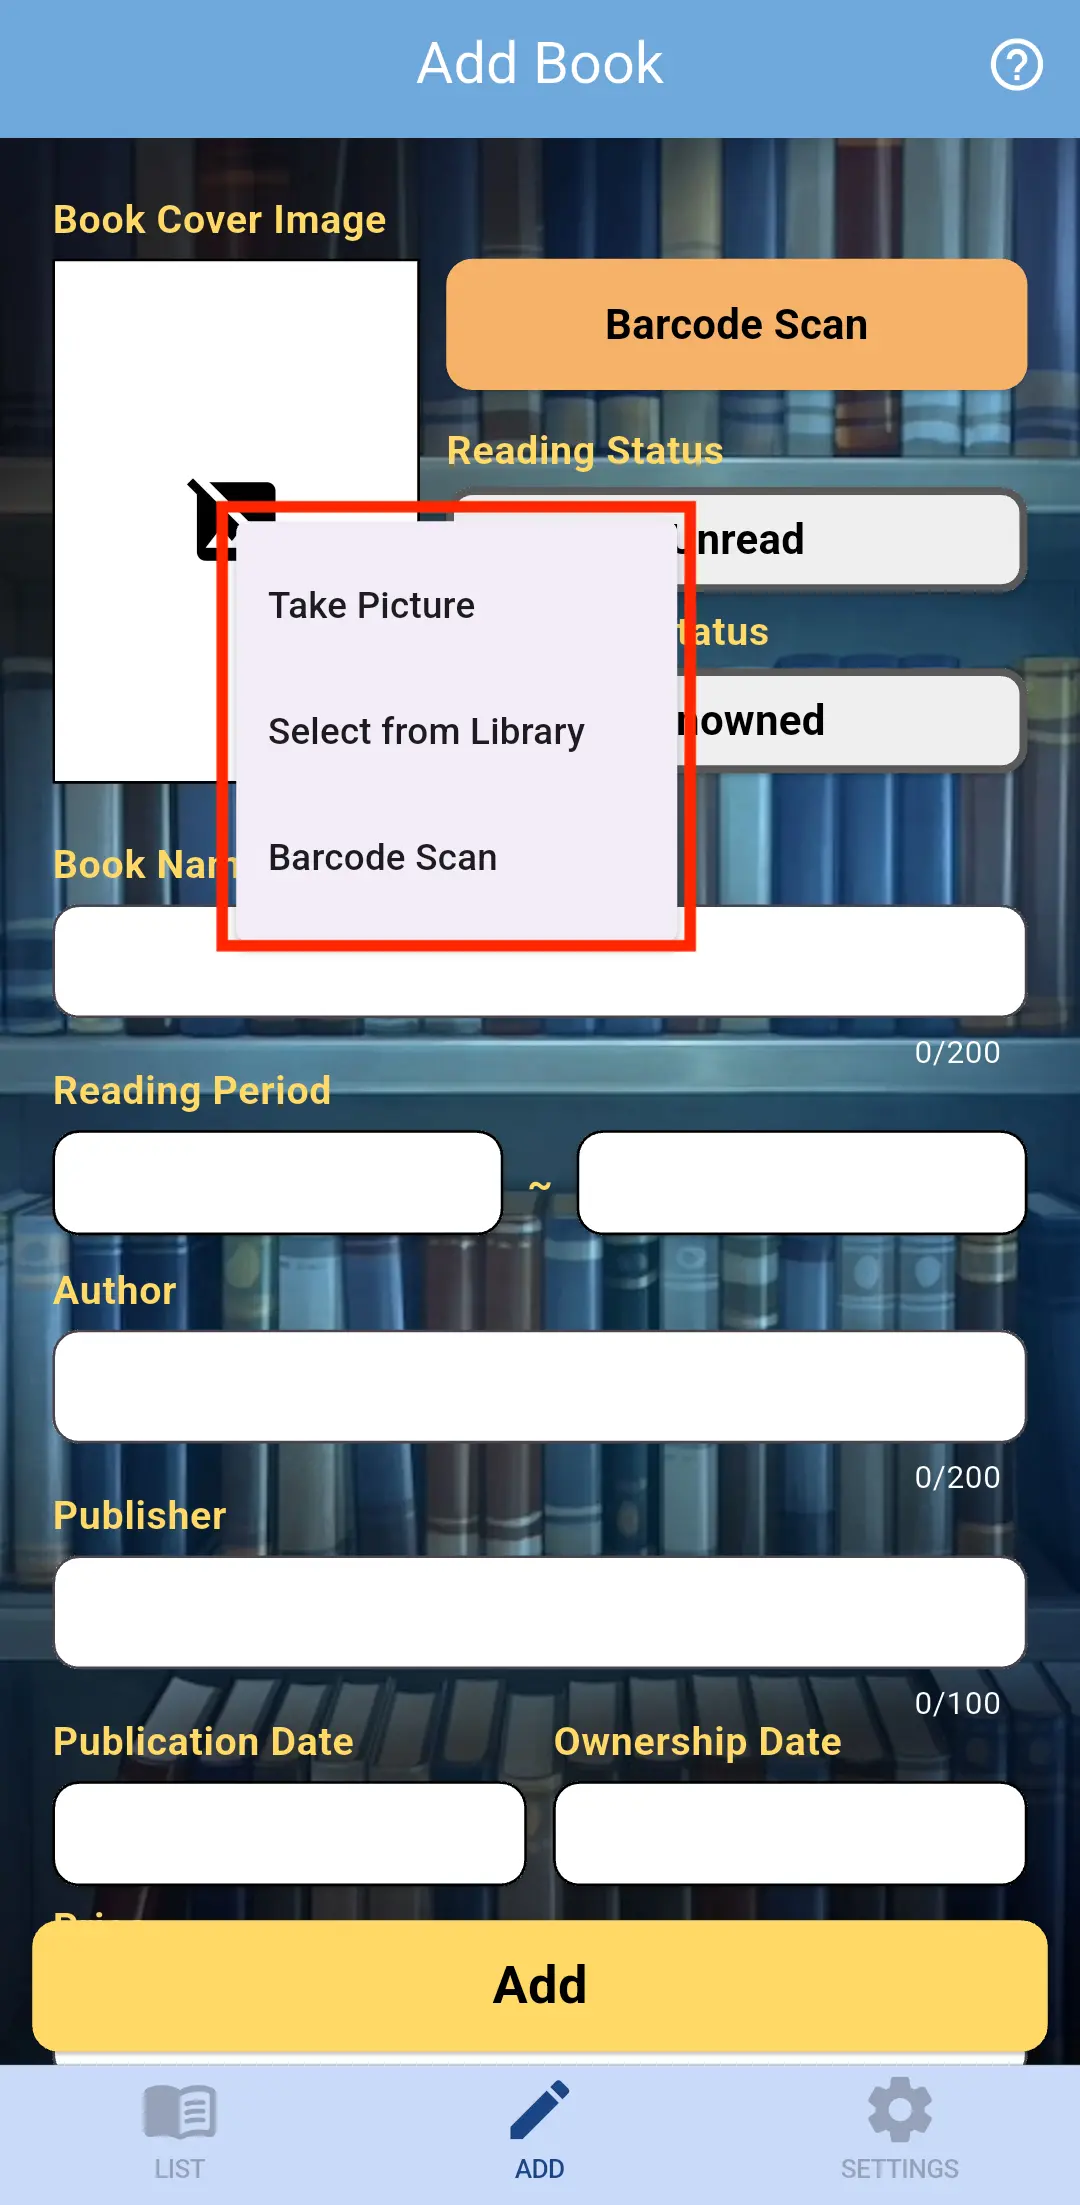
- If you select "Take Picture"
The camera will launch.
You can take a picture of the book and add it as the cover image.
Note: If camera access is not granted, please allow it in your device settings.
- If you select "Select from Library"
You can select a photo stored on your smartphone to use as the book cover.
- If you select "Barcode Scan"
The barcode scanner screen will open.
See [this guide] for instructions on how to use barcode scanning.
Change a Book Cover Image
To change the image, follow the same steps as when adding a book cover.
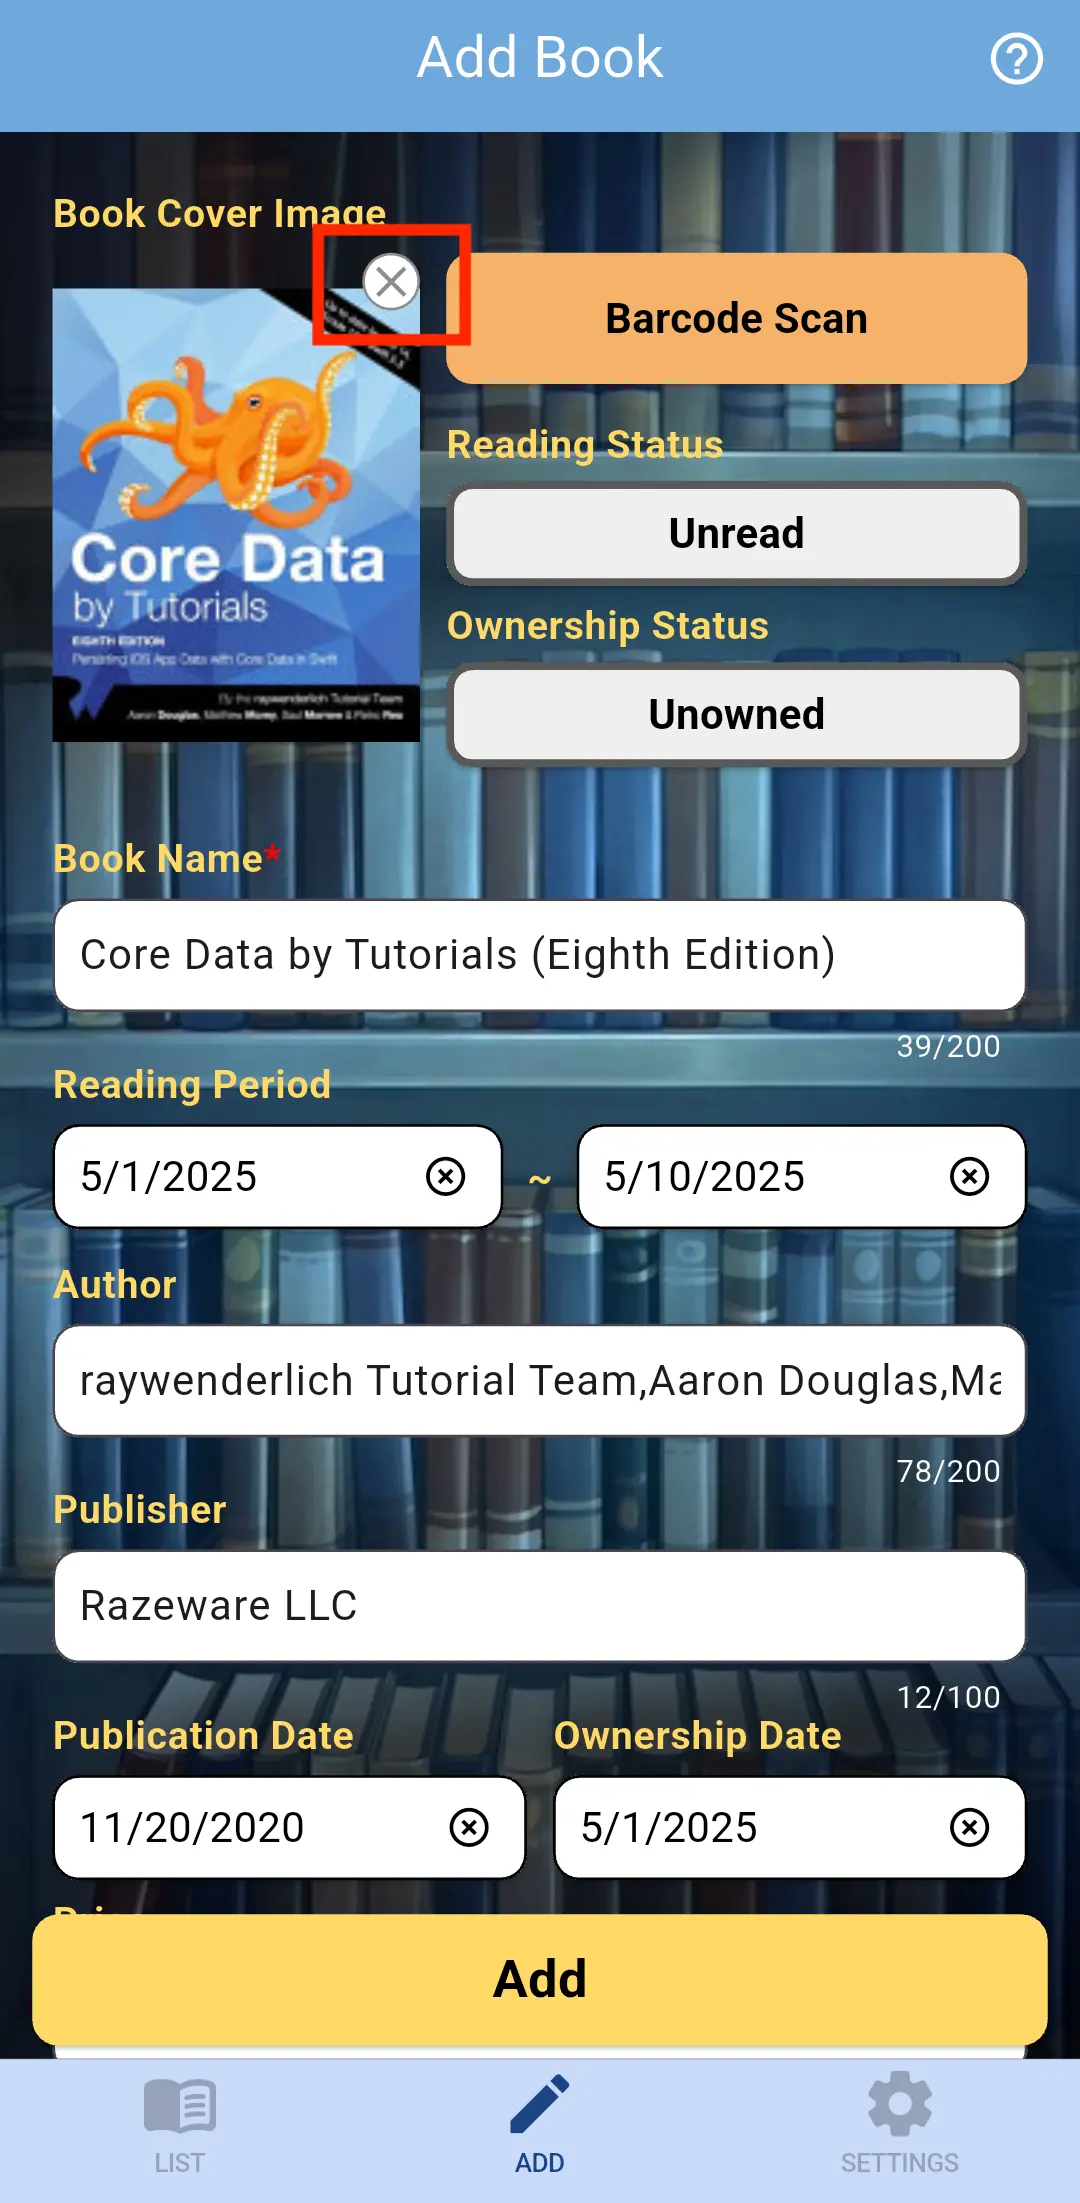
Delete a Book Cover Image
Tap the × icon in the top-right corner of the image to delete it.
Scan a Barcode
Step 1
Align the barcode within the red frame shown on the camera screen.
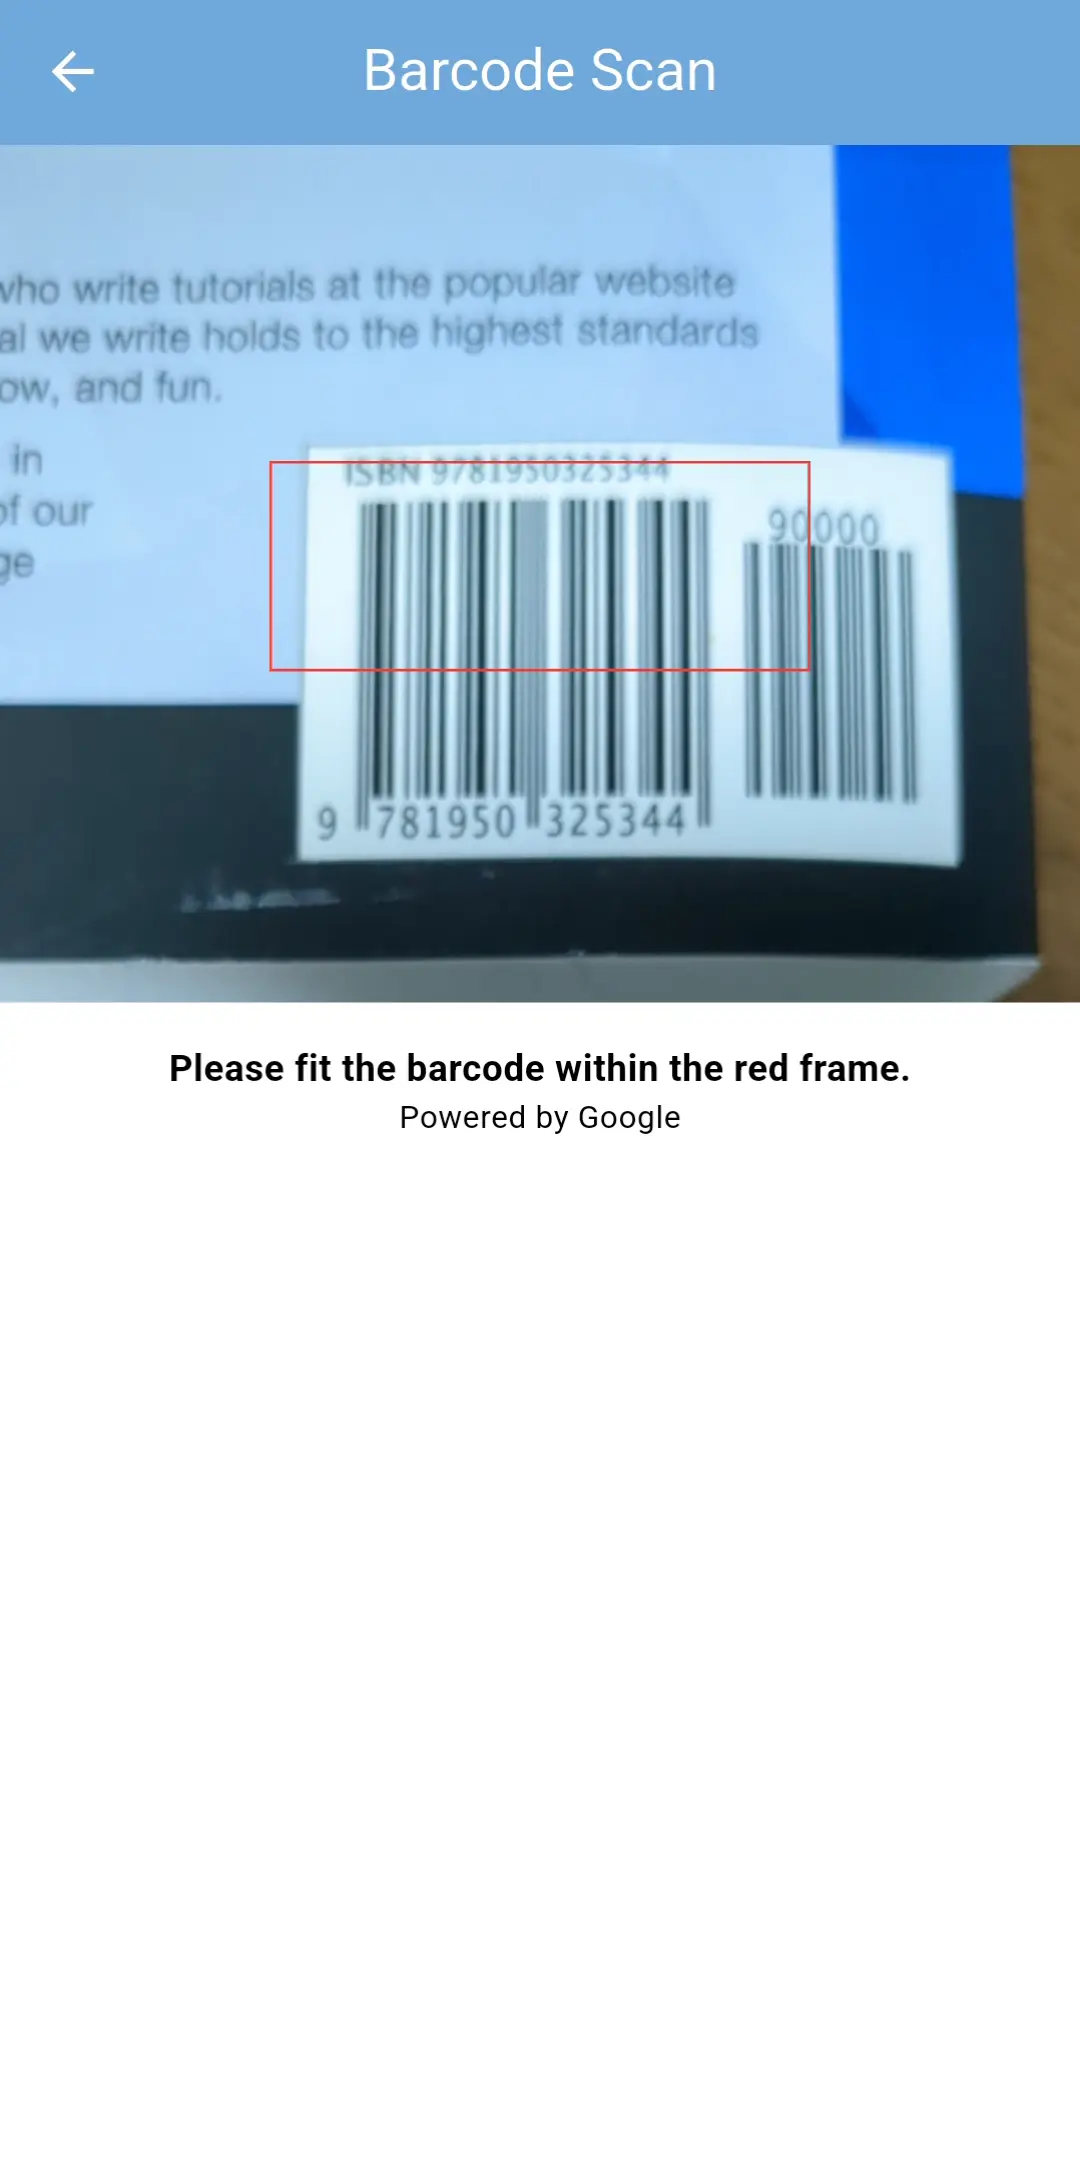
Step 2
If the book information is successfully retrieved, the barcode scanner will close automatically.
In Case of an Error
If an error occurs, please follow the instructions shown on the screen.
If the book information does not exist online, repeated scanning will result in the same error.
In such cases, we kindly ask you to add the book information manually.
Step 3
Please tap the Add button at the bottom of the screen.
Once you see the message "Successfully added" the process is complete.
If an error message appears, please follow the instructions in the message, correct the relevant fields, and tap the Add button again.
Update Book
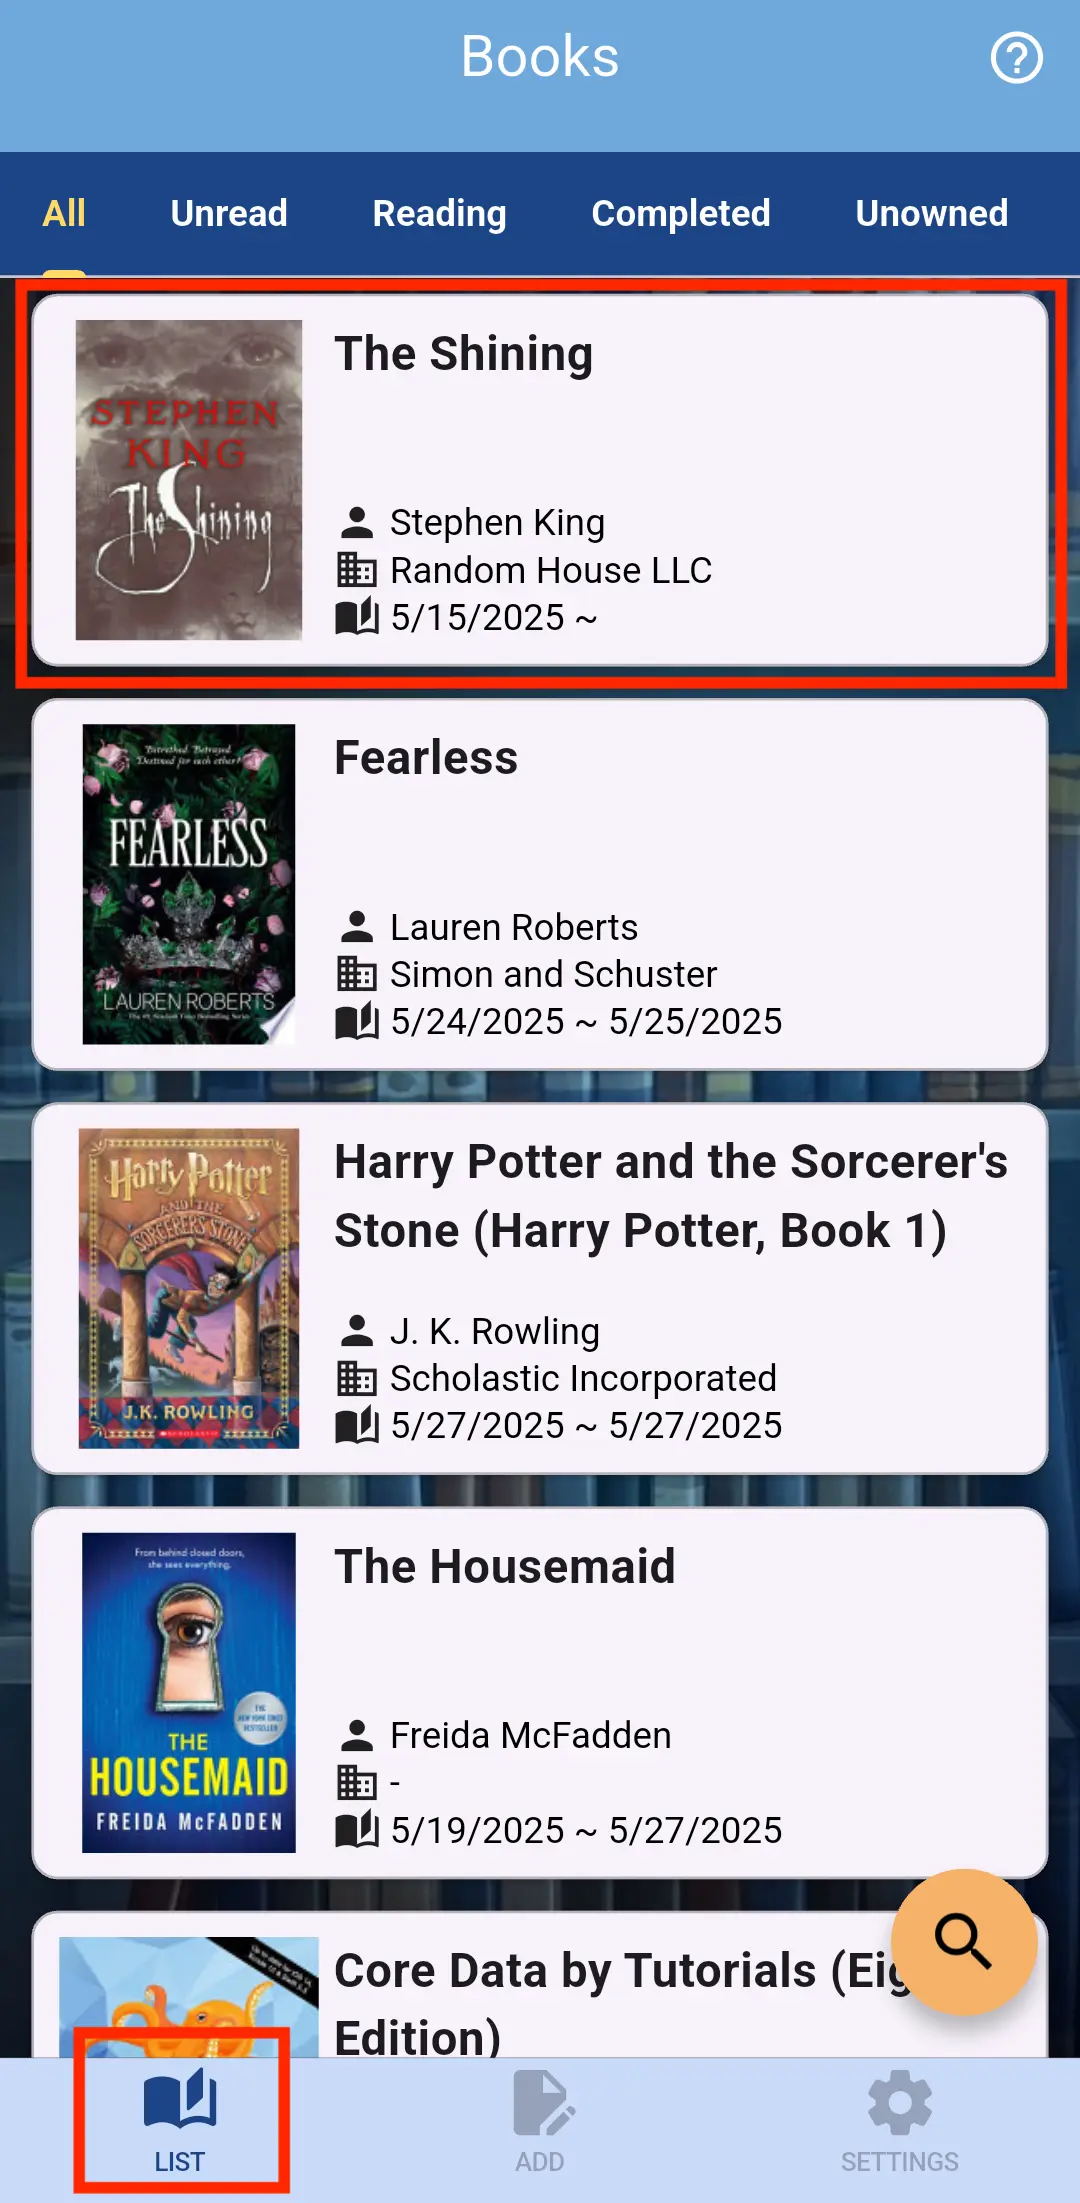
Step 1
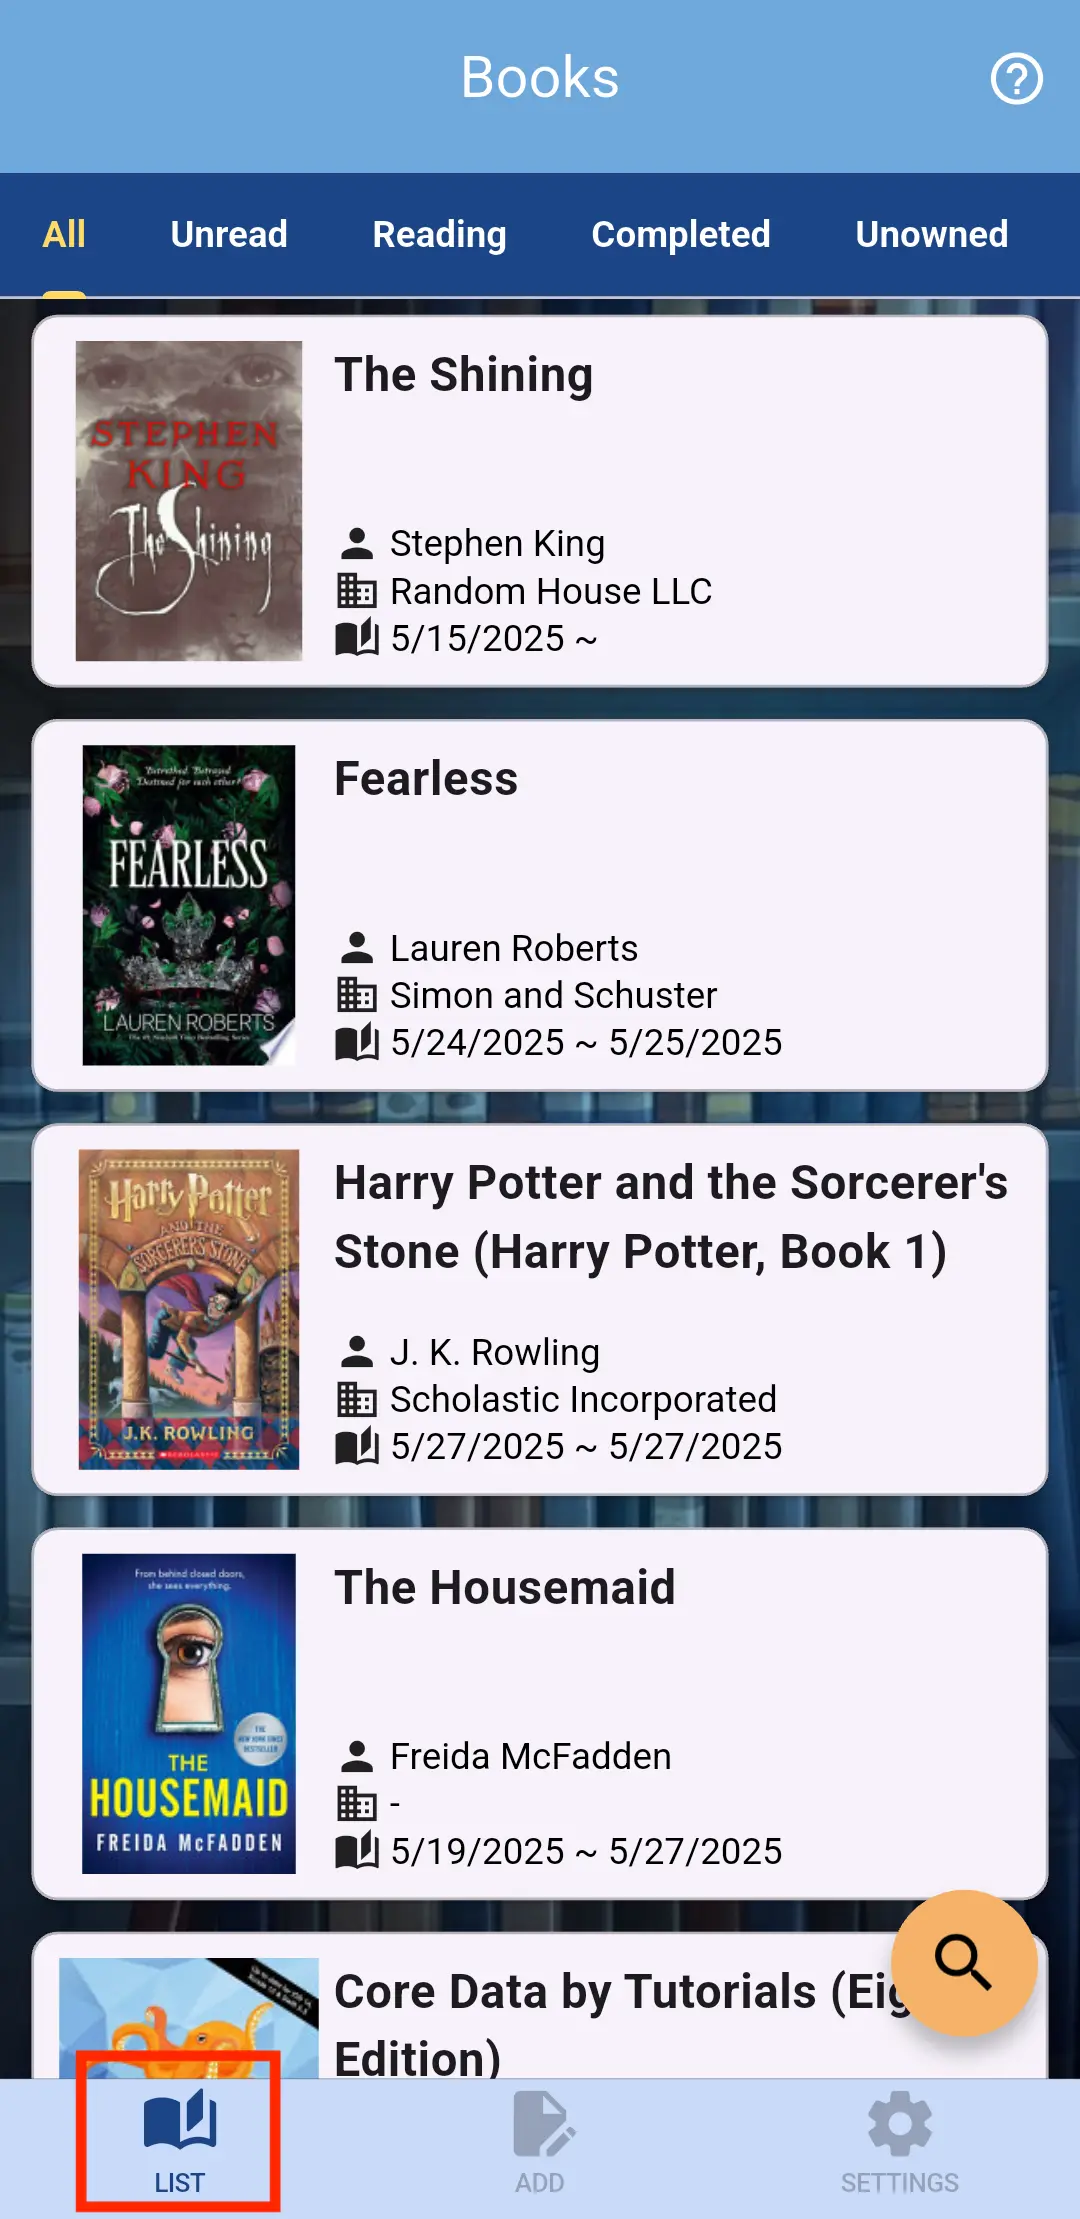
Tap the List tab in the app.
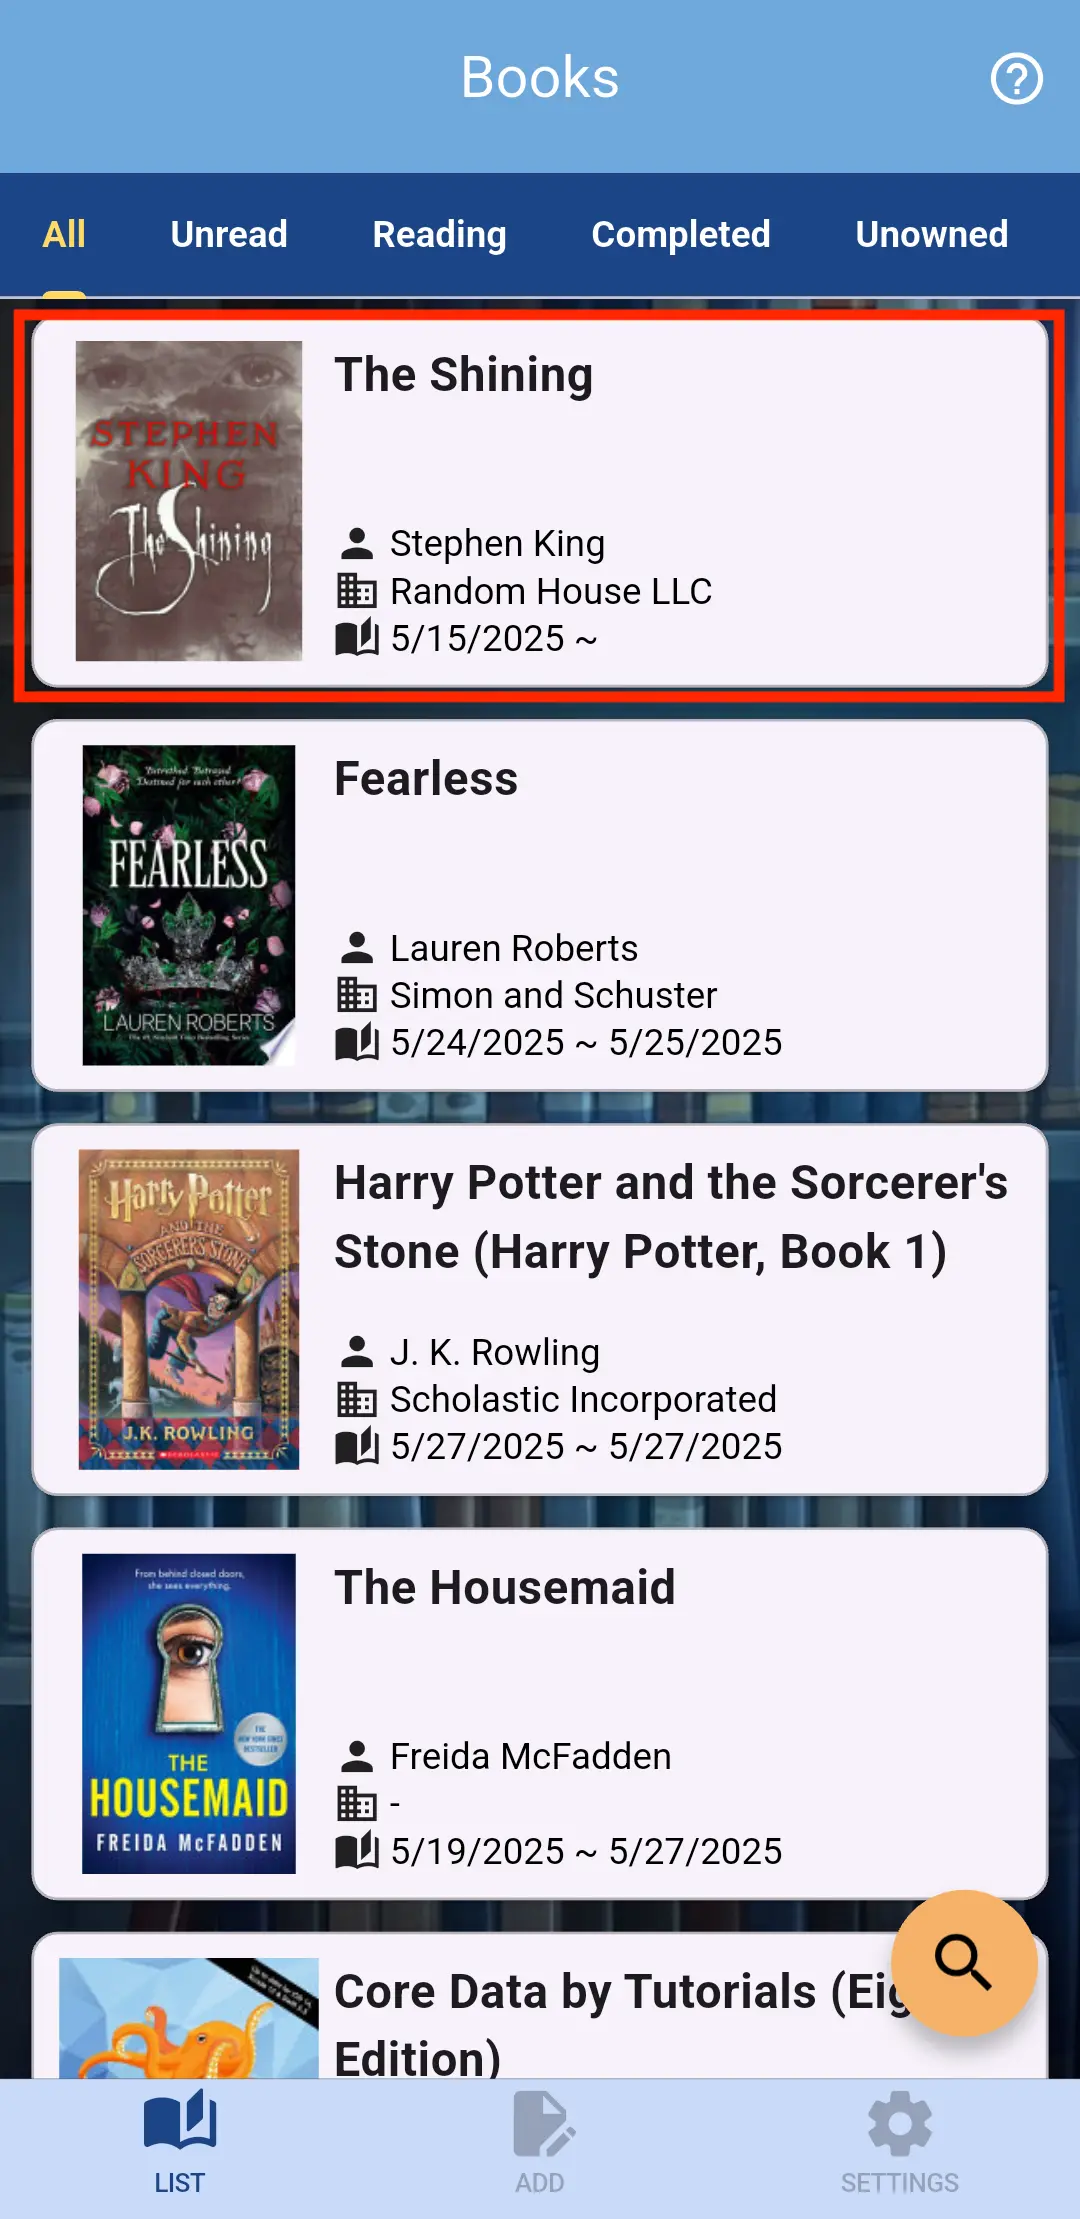
Please tap the tile of the book you want to update to open the book info screen.
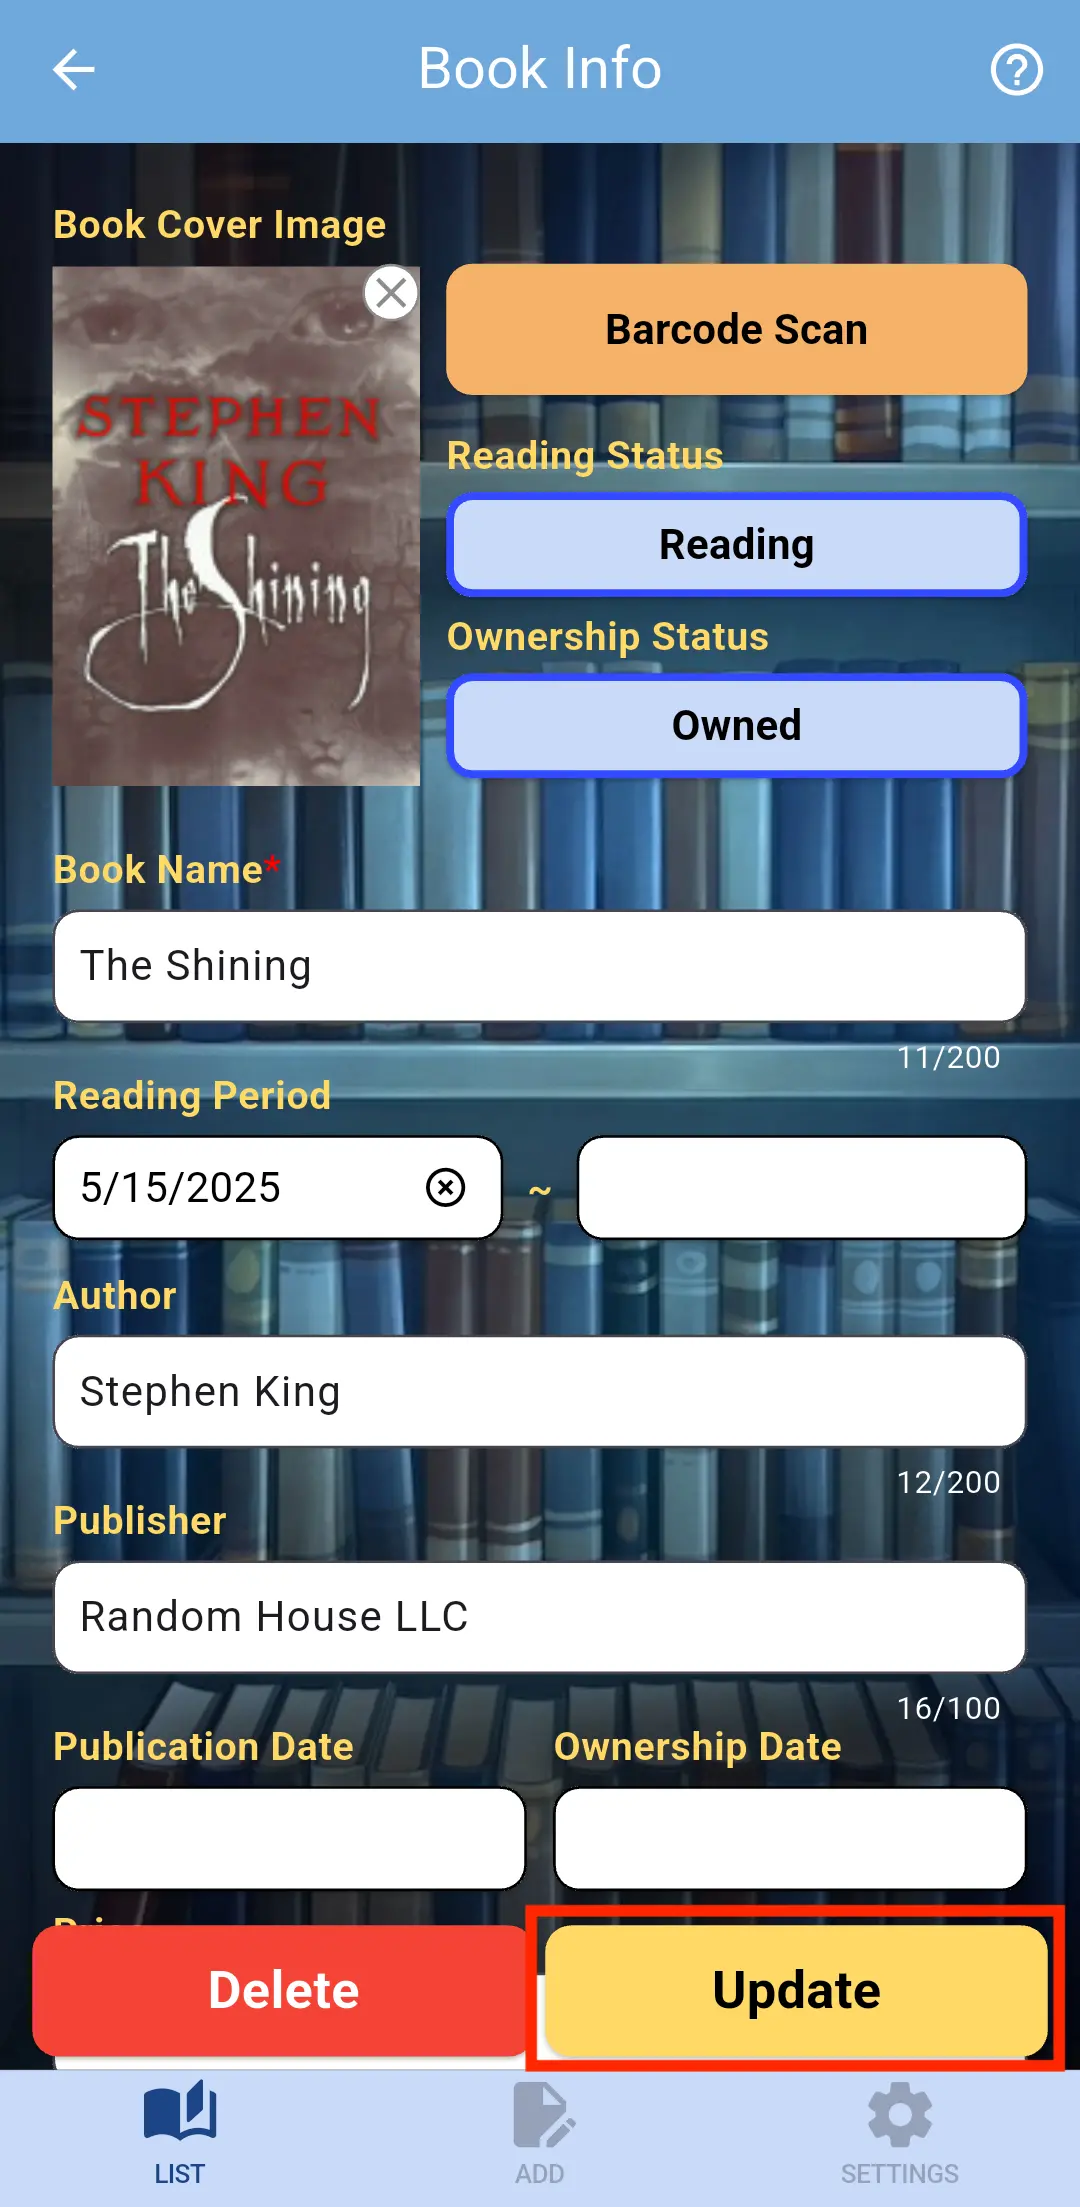
Step 2
Please fill in the fields you wish to update.
The method for entering data is the same as when Add Book information.
Step 3
Please tap the Update button at the bottom of the screen.
Once you see the message "Successfully updated" the process is complete.
If an error message appears, please follow the instructions in the message, correct the relevant fields, and tap the Update button again.
Delete Book
Step 1
Tap the List tab in the app.
Step 2
There are two ways to delete book info.
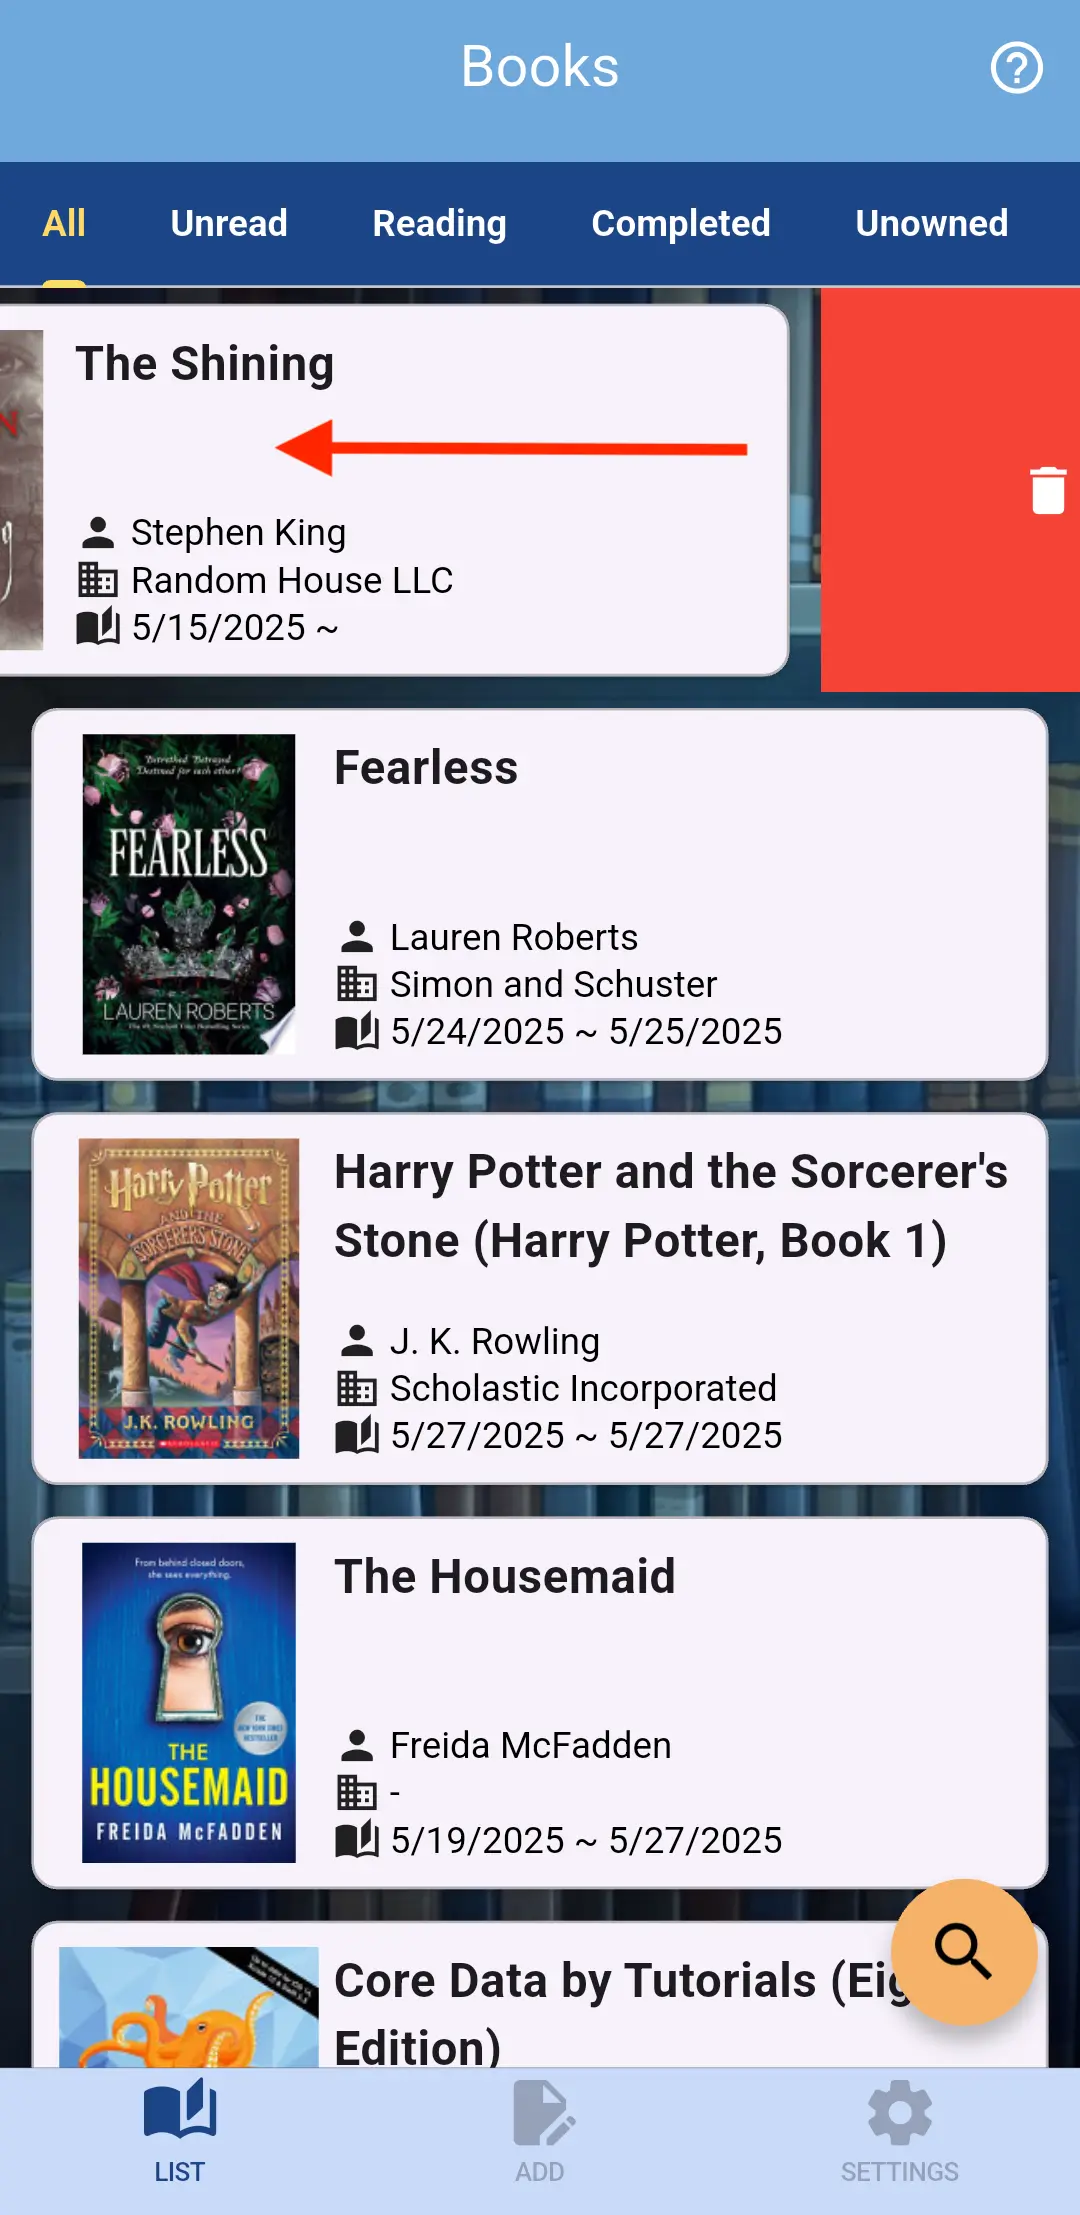
Step 2-1
While on the list screen, swipe the book you want to delete.
Step 2-2
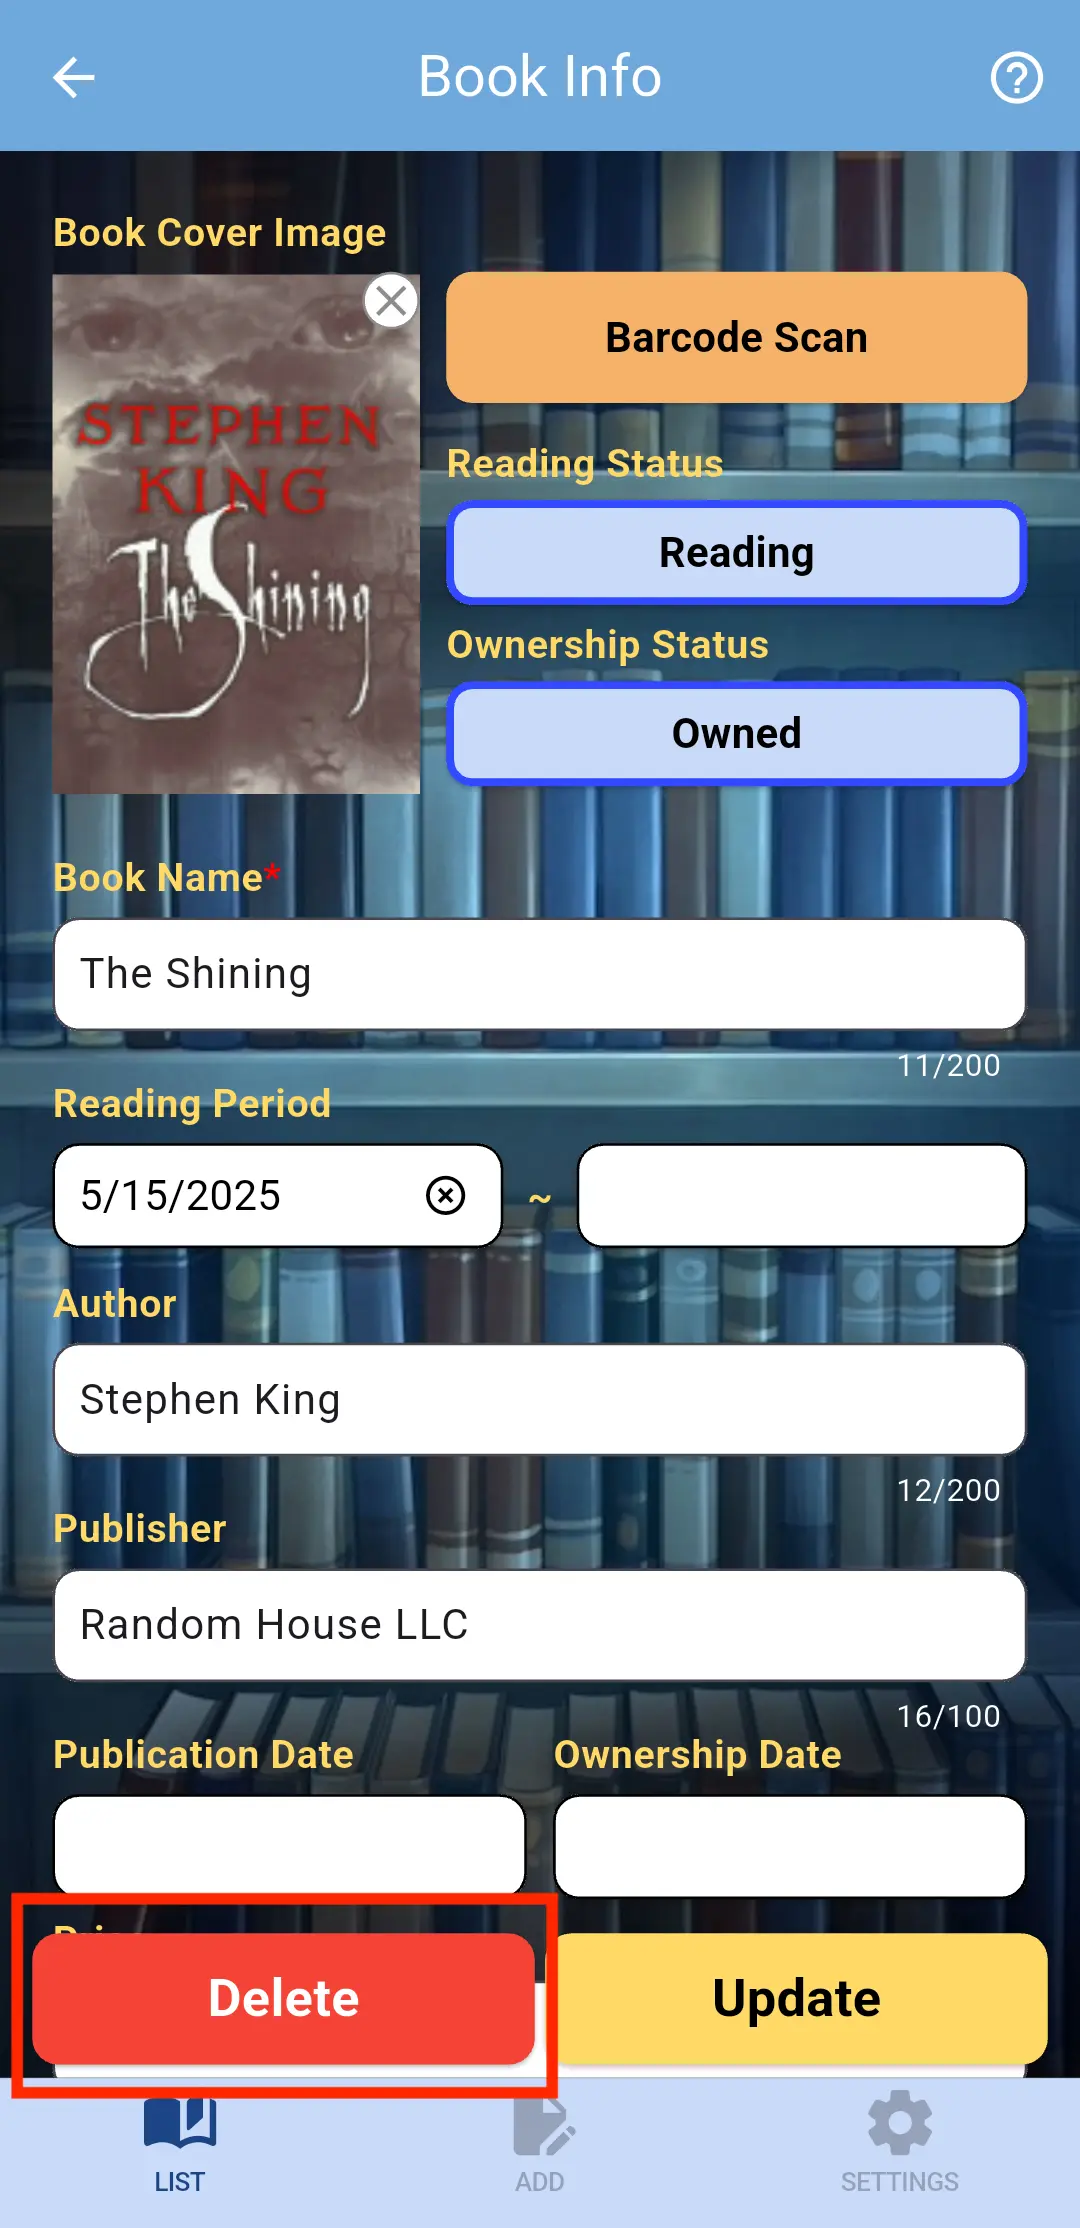
Please tap the tile of the book you want to delete to open the book info screen.
Please tap the Delete button at the bottom of the screen.
Step 3
Once you see the message "Successfully deleted" the process is complete.